Showing posts with label female. Show all posts

Friday, 10 April 2026

Angela's PaperArts: Birthday shutter and shaker cards

I made this shutter card for my sister's recent birthday.

Angela's PaperArts: Snazzi Scrappin birthday shutter card

When you hold the card base and pull up the tab at the top, the picture in the middle of the card flips over to form a different picture.  I've also placed the word "Sister" on this side too.

Angela's PaperArts: Snazzi Scrappin birthday shutter card

Here's the view of the card in both the closed & open position plus the back of the card (where I wrote my message to my sister).

Angela's PaperArts: Snazzi Scrappin birthday shutter card

I used dies from the Shutter Create A Card set from Snazzi Scrappin' to make this card. It's such a fun, interactive card to make.

I also created a shaker card using the same products for my niece's birthday who happens to play the violin. Again, it's a fun card to make with the sequins adding that extra touch to the card.

Angela's PaperArts: Snazzi Scrappin birthday shaker  card

Thanks for visiting.


Tuesday, 27 January 2026

Angela's PaperArts: Aussie Floating Hexagon pop out card

I made this floating hexagon pop out card for a friend's recent birthday. 

Angela's PaperArts: Aussie floating hexagon female birthday card

As my friend likes the colour green, I couldn't go past having an Aussie gum leaf theme for this card.  The cardstock I used to create the card base & gum leaves is Stampin' Up!'s Very Vanilla and Tranquil Tide. The patterned paper is from Scrapbook Fantasies' Aussie Christmas collection. 

Here's a side view of the card so you can see how the front panel 'floats' above the card.

Angela's PaperArts: Aussie floating hexagon female birthday card

I love that this card folds flat for posting. Here's an overhead view of the card which easily stands on its own.

Angela's PaperArts: Aussie floating hexagon female birthday card

If you'd like to see a masculine version of this card, please click here. You'll also find a link to the tutorial there too.

Angela's PaperArts: Aussie floating hexagon female birthday card

Thanks for visiting.


Wednesday, 17 December 2025

Angela's PaperArts: Pop-up Star Explosion birthday card

While Christmas is just around the corner, I'm still making cards for family & friends who are celebrating their birthday during December.

I made this pop-up star explosion card for one of my good friend's recent birthday.

Angela's PaperArts: Pop-up star explosion special fold birthday card

The card features the retired Stampin' Up! Mediterranean Blooms papers along with the Brilliant Wings die set. It folds together like a standard gatefold card for posting and has a bellyband to keep it together.

Here's how I decorated the back of the card. I left one panel blank in order to write a message to my friend.

Angela's PaperArts: Pop-up star explosion special fold birthday card

To create the card, I used the tutorial by Mixed Up Craft & adjusted the size to suit what I wanted. You can find the original tutorial here.

Thanks for visiting.

Friday, 10 October 2025

Angela's PaperArts: Triple Point birthday card

I needed to make a card for someone who loves the colour purple. I created this Triple Point card for her.

Angela's PaperArts: Triple point birthday card

Here's a side view of the card where the front of it stands on the three 'points'.

Angela's PaperArts: Triple point birthday card

Here's how I've decorated the inside of the card. I've added a square piece of patterned paper onto the card base which is partially seen when the card is closed. I then added an additional white cardstock triangle in the middle so I have plenty of space to write a message to the card recipient.

Angela's PaperArts: Triple point birthday card

You may remember a previous Triple Point card that I made a couple of years ago for Father's Day and you can find it here. I mainly used embossed cardstock for that card instead of the patterned paper used here.

I've used a variety of products to create this new Triple Point card. The cardstock, stamps and punched elements are from Stampin' Up!, the patterned paper is from the Scrapbook Fantasies Lavender Dreams collection and the card base & layers were cut using the Snazzi Scrappin triple point card die set. 

Tutorial:

While I did use the Snazzi Scrappin' die set to create this card because it makes cutting and assembly quick & easy, I used to cut all the pieces manually using my template (pictured below) as a starting point.

To manually re-create this style of card (with one mat layer):

  1. Cut the cardstock and patterned paper needed for this project based on the template below.
    Note: the white paper represents the card base & the green paper represents patterned paper.
    Score the card base at 14.8cm long side as noted with dotted lines on the template's white paper.Angela's PaperArts: Triple point card template

  2. Adhere the 'green' triangle layers on top of the card base's corresponding 'white' triangles.
  3. Angle, overlap and adhere the two thinner triangles over the card front centre panel so that the three points are all aligned at the bottom of the card as seen in my Triple Point card above.
  4. Decorate the card front and inside of the card to suit your occasion.
  5. Optional: Cut a 14x14cm square of plain or patterned paper to decorate inside the card.
  6. Optional: Cut another 14cm large triangle in a neutral colour the same size as the large green paper in the template. Adhere this inside the card as a specific space to write your message to the recipient.
Thanks for visiting.


Tuesday, 4 February 2025

Angela's PaperArts: Meandering Meadows pop-out panel birthday card

I do like making special fold cards and today's birthday card is no exception. One of my favourite Online Exclusive paper packs, Meandering Meadows, is being discontinued and features on this card.

From the outside it looks like a standard card, but inside is where things get a bit more interesting.

Angela's PaperArts: Stampin Up Meandering Meadows pop-out birthday card

Here's the inside of the card.

Angela's PaperArts: Stampin Up Meandering Meadows pop-out panel birthday card

Whilst I, like most crafters, like to use new things, I still find myself reaching for some of my older, favourite stamp sets & dies too. For this card I did use some retired Stampin' Up! stamp & die sets, along with the Snazzi Scrappin pop-out panel card die set (which makes it quicker to create this card style compared to when I used to manually cut it). If you like butterflies, the current Stampin' Up! Sketched Butterflies or Beautiful Butterflies bundles are a good substitute to the retired ones used on this card.

If you like the Meandering Meadows paper you can find it and many other reduced & discontinued products in the Last Chance section of my online store. 

Stampin' Up! updates:

  • Two new Kits have been released today. These are perfect for the time poor crafter.
  • Sale-A-Bration continues until the end of February. The good news is that additional Level 1 freebie options are available to select for eligible orders while stock lasts. It's the perfect time to stock up on your crafting essentials and earn some free products.

The current Stampin' Up! products used on this project can be purchased from my online store if you live in Australia.

Thanks for visiting.


Thursday, 11 July 2024

Angela's PaperArts: Stampin' Up! Thoughtful Journey slimline birthday card

I often mix and match Stampin' Up! products to create a card or other project.

Angela's PaperArts: Stampin Up Thoughtful Journey slimline birthday card

In this example, my slimline card was created using patterned paper from the Unbounded Beauty pack and diecuts from the Thoughtful Journey and Something Fancy die sets.

Here's how I decorated inside the card.

Angela's PaperArts: Stampin Up Thoughtful Journey slimline birthday card

Do you also mix & match when creating a project?

The current Stampin' Up! products used on the project can be purchased from my online store if you live in Australia.

Thanks for visiting.

Thursday, 27 June 2024

Angela's PaperArts: Round We Go birthday Z fold card

This month I've been featuring the versatile Stampin' Up! Round We Go stamp & die bundle. For this card I used the dies to create a flower instead of a rosette embellishment. I used the Bough Punch to create the leaves.

Angela's PaperArts: Stampin Up Round We Go floral birthday Z fold card

I realise these dies are meant to embellish either the stamped or diecut rosette, but they also looked like they could be used as flower petals too. What do you think?

Here's a side view of the card.

Angela's PaperArts: Stampin Up Round We Go floral birthday Z fold card

Here are the dies I used to create the flower on the card. I mixed & matched the diecuts, but you could make the flower by die-cutting two of the same and layering them together. 

Angela's PaperArts: Stampin Up Round We Go floral birthday Z fold card

This bundle, along with other stamp & die bundles and machines, is discounted until 30 June.

Angela's PaperArts: Bundle & save

The current Stampin' Up! products used on the project can be purchased from my online store if you live in Australia.

Thanks for visiting.


Thursday, 10 November 2022

Angela's PaperArts: Framed Florets birthday card

I made this birthday card for a special young lady. It features the new Stampin' Up! Framed Florets stamp set & co-ordinating dies bundle.  I paired this bundle with the Pretty Prints Designer Series Paper as this is one of her favourite colours.

Angela's PaperArts: Stampin' Up! Framed Florets bundle birthday card with Pretty Prints DSP

I used two of the oval dies on this card.  One cuts out the hearts in an oval shape and these cutouts were highlighted by placing some Basic White cardstock behind the Pretty Prints layer.  I then used one of the other ovals as a frame around the birthday sentiment.  The leafy diecuts are also from the die set too.

Here's a close-up of the sentiment showing the etching that the die puts into the frame.

Angela's PaperArts: Stampin' Up! Framed Florets bundle birthday card with Pretty Prints DSP

The Frame Florets bundle is part of the bigger Fitting Florets collection. The products used on this project can be purchased from my 
online store if you live in Australia.

Thanks for visiting.


Thursday, 28 July 2022

Angela's PaperArts: Splendid Day birthday card

I made this birthday card for my niece.  It features the gorgeous Splendid Day foiled designer series paper.  This paper is very shiny and I show all the papers included in this pack in the first part of my gatefold shutter card video.

Angela's PaperArts: Stampin Up Splendid Day split card textures die birthday card

I also used one of the Split Card Textures dies to diecut part of this paper for added interest.  The sentiment is from the Framed Occasions stamp set and I diecut it using the Beautiful Shapes dies.

You can find the products used on this card in my online store

Just a reminder that between now and 31 August, 2022, Stampin' Up!'s Sale-A-Bration is happening. 

So what is Sale-A-Bration ('SAB')? Well until 31 August, you can choose free product for every $90 of product ordered.  There's no limit on how many Sale-A-Bration items you can receive as it's based on the total amount of your order.  For example, a $180 order is eligible to choose either 2 x $90 SAB products or 1 x $180 SAB product.

There are also two other benefits during SAB:

  • Host rewards: Any workshop or individual product order of $500 or more will automatically receive the Perfect Pomegranate stamp set.
  • Joining rewards: For $169 you can join Stampin' Up! and receive $235 worth of products of your choice with free shipping PLUS during SAB, you will automatically receive the Making Plans Collection for free. To learn more about the benefits of joining, here's a link to read more about it or you can also contact me - I'd be happy to answer your questions.
So why not head over to my online store and take advantage of Sale-A-Bration to receive free product with your next qualifying order.

The products used on this project can be purchased from my online store if you live in Australia.

Thanks for visiting.

Wednesday, 13 April 2022

Angela's PaperArts: Crane of Fortune split panel birthday card

This split panel birthday card features the Stampin' Up! Crane of Fortune stamp set and co-ordinating dies bundle along with the gorgeous Symbols of Fortune Designer Series Paper.

Angela's PaperArts: Stampin Up Crane of Fortune bundle and Symbols of Fortune dsp split panel birthday card

I love all the gold foiling on this paper - it adds an elegant touch to the project.   I also used the Gold  Metallic Specialty Papers for one of the diecuts and added some Gilded Gems onto the centre panel too.

A split panel card is easy to make:
  • Cut the middle out of the centre of a tent fold card base
  • Flip the centre cardstock vertically to create the centre panel
  • Adhere the panel to the remaining top & bottom sections of the card base.  You can add the panel to the side or centre of the card - the choice is yours.
  • Decorate the centre panel to suit
For my card, the sentiment is actually on the inside panel of the card.

Here's an angled view of the freestanding split panel card.
Angela's PaperArts: Stampin Up Crane of Fortune bundle and Symbols of Fortune dsp split panel birthday card

The products used on this project can be purchased from my online store if you live in Australia.

Angela's PaperArts: Stampin Up Last Chance Sale

You'll also find many retiring products on sale between now and 2 May, 2022. 

Thanks for visiting.

Thursday, 26 January 2017

Beautiful you elegance

The Stampin' Up! Beautiful You stamp set enables you to create quick, but elegant cards.


This is the second card I've made recently using the Beautiful You stamp set which features three ladies in different poses.  For this card, I started with a Stampin' Up! Basic Black card base.  I stamped the lady in Archival Basic Black and then stamped the Melon Mambo colour onto the dress (and yes, the pink 'squiggles' on her dress is from a stamp, not a marker).  I used a blender pen to pick up some Melon Mambo ink to colour her hat to match.  The sentiments are both from the same stamp set. 

I then layered the stamped Whisper White card mat onto the card base and layered some Pop of Pink designer series paper onto the left edge.  I diecut the Basic Black cardstock using the Flourish thinlits border die and added this onto the Pop of Pink paper. 

What lady doesn't like a little bling, so I added the Basic Jewel Rhinestones into the centre of the border diecut and also under the 'In Style' sentiment to finish the card.  I have some other samples of this card to show you in the coming weeks using paper piecing and watercolouring techniques, so pop back later to see which technique you prefer with this stamp set.

The products used on this card have been listed below - just click on the picture and it will take you to my online store where the product can be purchased.  Workshops and papercrafting classes are also available - please contact me for details. 

Thanks for visiting.


Product List

Thursday, 19 January 2017

Flirty floral birthday

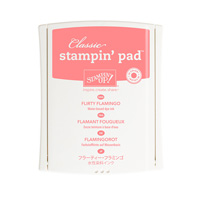
I made this birthday card recently for a friend. It features the Stampin' Up! Detailed Floral thinlits and Stylized Birthday stamp in a Flirty Flamingo, Gold and White colour combination.


I started with a Whisper White card base and added a strip of Gold Foil down the left side of the card.  I then die cut the Detailed Floral piece in Flirty Flamingo card stock and adhered it onto Whisper White card stock which had the Happy Birthday greeting stamped in Flirty Flamingo ink. This was then layered onto a slight bigger piece of Watermelon Wonder card stock and added to the card base.  A couple of metallic enamel shapes and a gold bow were added to complete the card.

The products used on this card have been listed below - just click on the picture and it will take you to my online store where the product can be purchased.  Workshops and papercrafting classes are also available - please contact me for details.

Thanks for visiting.


Product List